
How to Deploy Tailscale on a LightNode VPS

Tailscale connects servers and devices through a private network built on WireGuard. A LightNode VPS can act as an always-on node close to your cloud services, development systems, or internal tools.
LightNode provides Tailscale as an application image. The image prepares the server environment, but you still authenticate with your own Tailscale account and manage access policy in the Tailscale admin console.
Create a Tailscale VPS on LightNode
What you need
- A Tailscale account
- A LightNode account
- An SSH client
- A plan for which users, devices, or subnets should reach the VPS
The entry LightNode plan is enough for a Tailscale node and light administration tasks. Choose more CPU, memory, and bandwidth when the same VPS will also run applications, databases, or a subnet router with sustained traffic.
Create the Tailscale VPS
- Open the Tailscale VPS page and select the application deployment option.
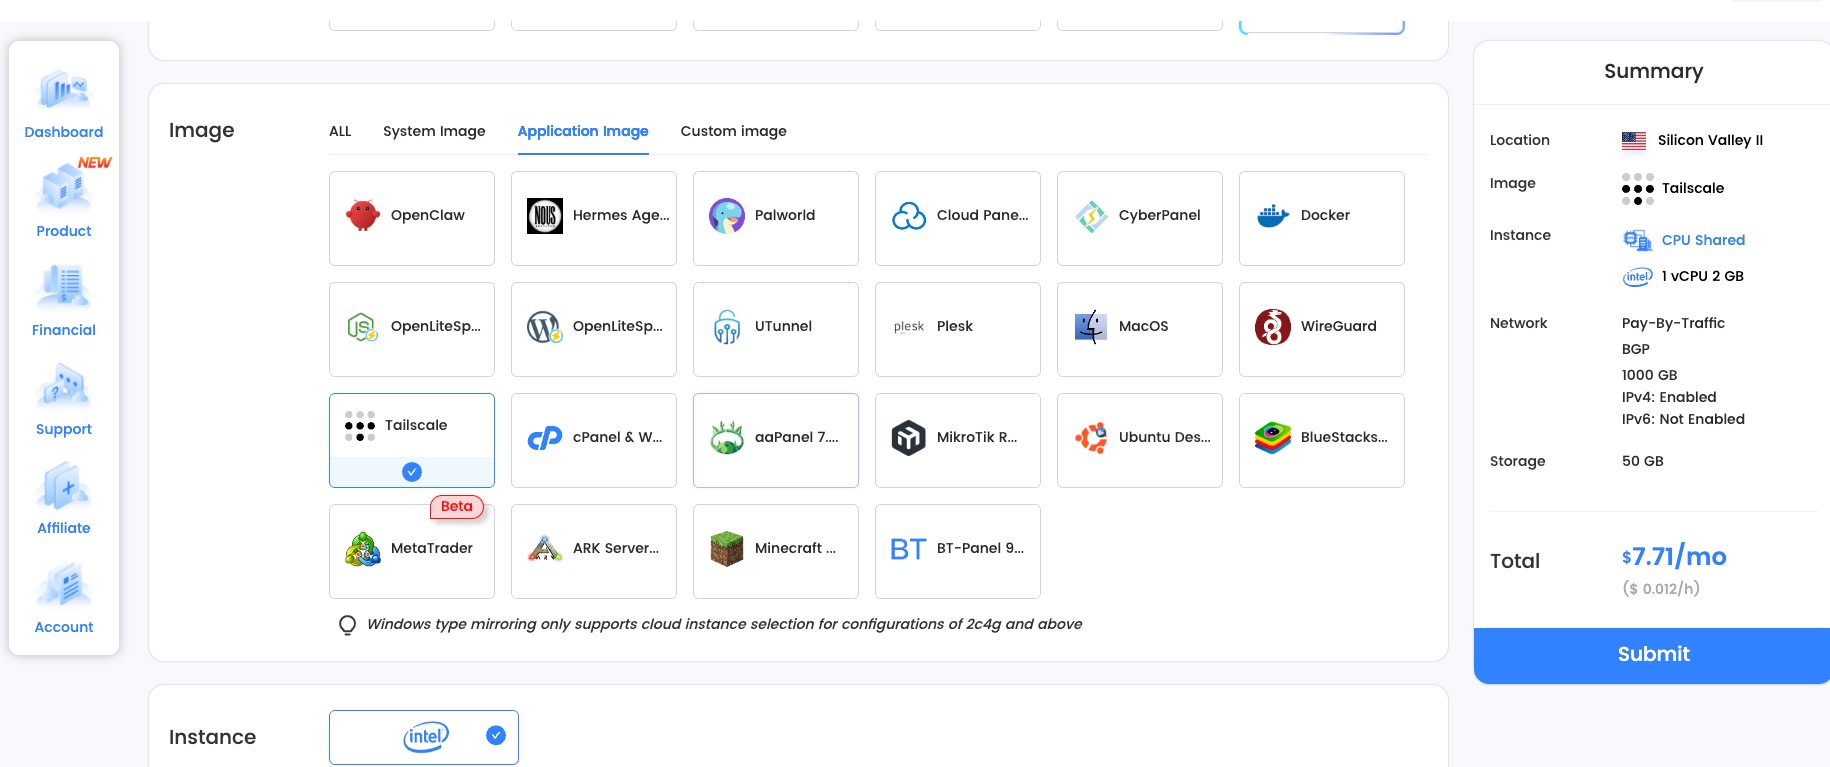
- Choose the Tailscale image in the LightNode application catalog.
- Select a location near the systems or people that will use the node.
- Create the VPS and save its public IP and SSH credentials.
The application catalog confirms that Tailscale is selected before the VPS is created.
Connect and check the installation
Connect to the new server:
ssh root@YOUR_SERVER_IP
Check whether the Tailscale client and daemon are available:
tailscale version
sudo systemctl status tailscaled --no-pager
If you chose a standard Linux image instead of the Tailscale application image, use the current installation command from the official Tailscale Linux guide:
curl -fsSL https://tailscale.com/install.sh | sh
Add the VPS to your tailnet
Run:
sudo tailscale up
Open the login URL printed in the terminal, sign in to your Tailscale account, and approve the device. Then verify the node:
tailscale status
tailscale ip
The first command shows connected peers and connection state. The second prints the Tailscale IPv4 and IPv6 addresses assigned to the VPS.
Set access before adding services
Name the node clearly in the Tailscale admin console and apply the tags or grants used by your organization. Give each group access only to the services it needs.
For example, an internal dashboard can listen on its normal application port while the firewall allows access only through the Tailscale interface. You do not need to publish that dashboard to every address on the public internet.
If you enable Tailscale SSH, confirm that its access policy matches your normal administrator policy before closing an existing SSH session:
sudo tailscale set --ssh
Keep a working recovery path through the LightNode console while testing a new SSH policy.
Verify the private connection
From another approved device in the same tailnet, test the Tailscale IP:
ping TAILSCALE_IP
ssh root@TAILSCALE_IP
You can also connect using the MagicDNS name when MagicDNS is enabled for the tailnet. Test each required private service separately instead of assuming that a successful ping proves every port is reachable.
Troubleshooting
Check the daemon and recent logs:
sudo systemctl status tailscaled --no-pager
sudo journalctl -u tailscaled -n 100 --no-pager
If the device does not appear online, confirm that the VPS still has internet access, the login flow completed, and the device has not expired or been removed in the Tailscale console.
To request a fresh authentication flow:
sudo tailscale up --force-reauth
To remove the current account from the node:
sudo tailscale logout
Who manages what
LightNode provides the VPS, public IP, server resources, and Tailscale application image. Tailscale handles tailnet authentication and its control plane. You remain responsible for device approval, access policy, server updates, firewall rules, and the services running on the VPS.
The official Tailscale Linux documentation is the source of truth for current client commands and supported distributions.